spoon
Showing posts with label Party Food. Show all posts

Lemon Berry Cake with Mascarpone Filling

0

Category: , , ,


I am really excited to share this recipe with you because it's SO GOOD.  If you make this cake and don't eat it all yourself, you will look like a rock star in the kitchen, and hey, even if you do eat it all yourself, you'll at least know you're a rock star.


This cake is perfect for this time of year- it's light, lemony, creamy, and just all around dreamy.  The filling seriously could be as light as a cloud, if they were made of cheese.  It's pretty in its simplicity.  No need to break out piping bags or even icing spatulas.

Read More

Fire Roasted Salsa

0

Category: , , , , ,


My go-to salsa during winter when fresh tomatoes aren't available is the Pioneer Woman's Restaurant Style Salsa.  It has an impressive flavor and is quick and easy to boot.  I've made it dozens of times, and each time there's just never enough, even though it makes a ton.

I can't remember if this salsa remix was born out of the desire to experiment or just because I didn't have plain tomatoes, but a couple weeks ago I decided to try making the salsa with fire roasted tomatoes instead of plain ones.  This discovery has to rank right up there with sliced bread.  It's more complex- slightly smoky, spicy, and the flavor just feels...deeper.  It's so good!

Read More

Cowboy Beans

0

Category: , , , ,


With the country standing at the cusp of grilling season (sounds so dramatic, doesn't it?), this dish is one you'll want to make again and again.  It's one of those recipes that you unfortunately won't have a lot of leftovers if you take it to a potluck and one that almost everyone will ask for the recipe.

Read More

Homemade Rainbow Sprinkle Frosting

0

Category: , , , ,


This frosting.  Oh, this frosting.  If you're below the age of 40, you know it well.  It adorned at least half the cupcakes you ate as a child, and I have also been known to eat it as a dip with graham crackers.  So creamy, so tasty.  So discontinued.  A generation mourns.  There are imitators out there, but it's just not the same.

Until now, when it gets better.  I found this recipe for a homemade version on Pinterest, and it really does have the taste and close to the texture of the original.  Unfortunately, no homemade frosting will ever perfectly mimic the texture of canned frosting because it's more of a science project than food, and all those hydrogenated oils, syrups, and shelf stabilizers give it the texture we know (and many of us, like me, prefer).  This recipe, though, with its cream cheese icing base, comes pretty close to being that creamy, sort of light, spreadable frosting texture.  The flavor of this frosting is amazing, and since you make it, you of course get to play with how it tastes.

Read More

Ranch Dill Cheez-its

0

Category: , , ,


This recipe was shared with me several years ago by my good friend and former co-worker, Cindy.  Thank you Cindy!  She brought them to a party and I think I could have eaten the whole container.  There's just something about the way the cheesiness of the crackers combines with the dill and ranch dressing mix that really creates a memorable, crave-worthy taste.  Disclaimer: don't eat on a date!

Anyway, if you need something to make for a party, these are perfect.  They're easy and fairly quick (30 mins total time) to make, the recipe makes a lot, and they're very transportable and can be made ahead of time, oh and almost everyone finds them irresistible.

Ranch Dill Cheez-its

2 boxes Cheez-its or other cheese crackers
1/2 c. vegetable or canola oil
1 TB. dill
1 package ranch dressing mix

Preheat your oven to 200.  Pour your cheese crackers into a roasting pan or divided between two 9x13 pans.  Combine the ranch and the dill and sprinkle evenly over the crackers.  Mix to combine and distribute.  Pour the oil evenly over the crackers and also stir/mix to combine.

Bake in preheated oven for 10 minutes.  Take the crackers out and stir them around and bake 10 minutes more.

Pinterest Find: Pumpkin Molasses Cookies

0

Category: , , ,


I took these cookies to a Christmas party over the weekend, and they were a surprising hit.  Everyone seemed to really enjoy them, so that's a win.  I wasn't sure how they would be received since they're a cakey cookie.  In fact, I bet they'd make killer whoopie pies.


The dough uses a lot of pumpkin and not a lot of other fats or a ton of sugar, so I'd bet (hope) they would fall on the healthier side of the spectrum, but regardless, they are a nicely spiced cookie for the fall or holiday seasons.


I tried to show in this picture that the dough is more like a batter.  Even after having it in the freezer a couple hours, it was soft and sticky.  I would definitely recommend freezing rather than refrigerating the dough to make it just a little easier to work with.  Once you roll it in sugar, though, the stickiness goes away and you have these little gems below:


Pop them in the oven and they expand like crazy.  If you hate cookie edges running into each other, I'd recommend baking 6-9 per sheet. 

Overall, though, these are tasty little cookies.  They are very soft baked and nicely spiced, with a good pumpkin flavor as well.  After they're all gone, I thought about the whoopie pie/sandwich cookie idea.  Oh, well.  I guess I'll just have to start another batch!

from My Baking Addiction Blog

2 1/3 cups flour
2 tsp baking soda
1/2 tsp salt
1 tablespoon pumpkin pie spice
1/4 tsp black pepper
8 Tbs butter, room temperature
1 cup brown sugar, packed
1/4 cup molasses
2/3 cup pumpkin puree
1 large egg
1/2 cup sugar, for rolling                                

Whisk together the flour, baking soda, salt, pumpkin pie spice, and pepper.

Working with a stand mixer, preferably fitted with a paddle attachment, or a hand mixer in a large bowl, beat the butter on medium speed until smooth and creamy. Add the brown sugar, molasses, and pumpkin puree and beat for 2 minutes, scraping down the sides of the bowl as needed. Add the egg and beat for 1 minute more. Reduce the mixer speed to low and add the dry ingredients, mixing until the flour and spices disappear. If flour remains in the bottom of the bowl, mix the last of the dry ingredients by hand to avoid over beating. You will have a very soft dough.

Divide the dough in half and wrap each piece in plastic wrap. Freeze for at least 30 minutes, or refrigerate for at least 1 hour. The dough is sticky, so the longer time it can chill the easier it is to work with.

Preheat oven to 350 degrees F. Line 2 baking sheets with parchment paper.

Put the sugar in a small bowl. Working with one packet of dough at a time, divide it into 12 pieces, and roll each piece into a ball. Roll the balls in the sugar and use a the bottom of a glass to press down on the cookies until they are between 1/4 and 1/2 inch thick. Transfer to cookie sheets. Do not over crowd.

Bake the cookies one sheet at a time for 12-14 minutes, or until the top feels set to the touch. Remove baking sheets from the oven. Let cookies cool 5 minutes on the sheets before transferring them to a cooling rack.  Repeat with second batch of dough.

Candy Corn Cookies, A Pinterest Find Just in Time for Halloween

0

Category: , , , , , ,


I can't think of any Halloween or fall candy that I like better than candy corn.  It has to be a "good quality" candy corn, and not just any cheap imitation, but the particular taste, that chewy texture...yum!


I saw these cookies on Pinterest and loved how they looked so pretty and chewy, speckled with candy corn.  I made the dough up Monday night and baked up about half of it or so for some of the youth in our church last night.  Drew and I had to sample them beforehand.  You know, to make sure they were OK for others. 


These cookies are wonderful!  As you can see, the candy corn for me did not stay in tact as well as I thought they might, but the soft, chewy dough, mixed with the chewy, sugary candy corn...Halloween treat for sure.  Oh and the dough itself is so tasty that I probably need to keep this in mind when I go to reach for some more.

When they first come out of the oven, they are puffy, but don't worry; they will settle.


from Averie Cooks blog

1/2 cup unsalted butter, soften
3/4 cup light brown sugar, packed
1/4 cup granulated sugar
1 large egg
1 tablespoon vanilla extract
2 tablespoons cream or half-and-half
2 cups all-purpose flour
2 teaspoons corn starch
1 teaspoon baking soda
pinch salt, optional and to taste
1 1/2 cups candy corn (1o to 11 ounces)
1 cup white chocolate chips (or salted peanuts)

To the bowl of a stand mixer fitted with the paddle attachment (or large bowl and electric hand mixer), cream together the first 5 ingredients (through vanilla) on medium-high speed until light and fluffy, about 5 minutes.

Stop, scrape down the sides of the bowl, and add the next 5 ingredients (through optional salt), and mix on low speed until just incorporated, about 1 minute; don't overmix.

Add the candy corn, white chocolate chips (or peanuts), and mix until just incorporated.
Using a medium 2-inch cookie scoop, form heaping two-tablespoon mounds (I made 20). Place mounds on a large plate, flatten mounds slightly, cover with plasticwrap, and refrigerate for at least 3 hours, or up to 5 days, before baking. Do not bake with warm dough because cookies will spread and bake thinner and flatter. Important note - Strategically place candy corn so that it's not baking directly on cookie sheet because it will melt, burn, or turn runny if it is. The candy corn pieces need to be in the interior of the cookies, shielded and buffered by dough.

Preheat oven to 350F, line a baking sheet with a Silpat or spray with cooking spray. Place mounds on baking sheet, spaced at least 2 inches apart (I bake 8 cookies per sheet) and bake for about 9 minutes, or until edges have set and tops are just beginning to set, even if slightly undercooked, pale and glossy in the center. Do not overbake because cookies will firm up as they cool. Baking longer than 10 minutes could result in cookies with overly browned undersides. 

Allow cookies to cool on the baking sheet  for about 5 minutes before transferring to a wire rack to finish cooking. Cookies will keep airtight at room temperature for up to 1 week or in the freezer for up to 4 months. Unbaked cookie dough can be stored airtight in the refrigerator for up to 5 days, or frozen for up to 4 months, so consider baking only as many cookies as desired and save the remaining dough to be baked in the future when desired.


Notes

  • If you visit the original post site (the link to the original post is the recipe title), you will see that Averie's cookies are a bit thicker.  I used about half the dough she uses for one cookie, so that I'd have more.  This may have affected the candy corn staying in tact.
  • I baked mine 9 minutes, just like the recipe suggested.  Some still looked too underdone, and even after about 5 mins. were too soft to pick up from the baking sheet.  After further cooling- maybe 30 minutes- they were fine to pick up.

Homemade Baked Tortilla Chips

0

Category: , , , , ,


This post was borne out of necessity.  One day we were having fajitas, and we realized I forgot to buy tortilla chips, which as you know is a travesty, being that there's all that salsa just begging to be dipped.  We did, however, have a bunch of 6- inch corn tortillas, and so I decided to try to bake some up, and you know what?  They turned out awesome.  They're sturdy, have good flavor, and they almost have layers.  We loved them.


I used a Misto sprayer to get the oils nice and evenly distributed, and sprinkled them with Kosher salt.  I then baked them up and we ate them like our lives depended on it.  The corn tortillas, as opposed to the flour tortillas, stay nice and crispy, even a day or two after you bake them, which is nice if you want to make a batch to have for later snacking.


If you make these for a party, then you will want to start early.  I could only fit about 4 whole tortillas on a baking sheet, and that's only like 1 serving.  So yes, I ate a whole pan.  I'll go be filled with self loathing now.

Baked Corn Tortilla Chips
to make 1-2 servings

4- 6 inch corn tortillas
Canola or other flavorless oil OR cooking spray/spray oil
Salt (I use Kosher but regular would be fine)

Preheat an oven to 350 and center your oven rack.  Line a baking sheet with foil or parchment (optional, but makes for much easier cleanup).

Cut your tortillas into quarters (or whatever size you desire- sixths would be fine too).  Lay them flat in a single layer on your baking sheet, and spray with oil.  You can use a Misto sprayer, a pump sprayer, or even a spray bottle with a nozzle, or even cooking spray- you just want an even, light layer of oil on the chips.  Sprinkle with salt.  Turn over and repeat on the other side.

Bake in preheated oven about 10-15 minutes, flipping about halfway through.  They are done when they've crisped up and are golden with some light browning.

Notes

  • Depending on your love of salt, you may want to go easy at first.  Remember you are salting both sides (or just salt one side if you were heavy handed on the first side).  These can tend to be a little salty if you aren't careful.
  • Despite their sturdiness, they get soggy more easily than the store bought chips.  Be warned.


Chocolate Chip Pie; A Story of Success, Shame, and Woe

0

Category: , , , ,


If you've never known such drama associated with a pie, you probably have more of a life than I do.  Yesterday was the Harvest Celebration at my church, which is a potluck dinner in which we celebrate God's blessings through the year and we also kick off our revival.  I always think potlucks are a good time to try out new recipes, because you automatically have taste-testers, and if a dish turns out to be a flop, it doesn't ruin your meal because there's a whole slew of other dishes to be had.


After looking through different cookbooks, magazines, and my Pinterest dessert board, I decided to make this pie, because I had almost everything on hand that I needed to make it and it looked really easy.  Plus, the name sounds like it would be a pretty safe bet.


Let me tell you, it was a solid success.  It tastes like a slightly under baked chocolate chip cookie, thick, gooey, and just wonderful.  I was so glad to have a new and proven success on my hands.  

I ended up having just a little over half the pie left over, and this is where the tale of woe and shame starts.  I baked my pie in my glass pie dish, and the dish slipped off the stack of dishes I was carrying and fell on the sidewalk, shattering the dish and landing the pie right side up.  Woe.  Woe.  

Now for the shameful part: I tried to salvage the pie.  I actually thought for a minute, "surely I can just pick the pie up and put it on a plate, right?"  WRONG.  Glass had shattered all through that pie, so I had to throw the whole thing away.  I didn't cry, but I'm still shaking my head.  I'm just keeping it real.

Either way, this pie is a great little dessert- think skillet cookie with a pie crust.  YUM!

Chocolate Chip Pie
From Just Desserts by Paula Deen

1 cup sugar
1/2 cup flour
2 eggs, beaten
1/2 cup (1 stick) butter, melted and cooled
1 cup chopped pecans
1 cup semisweet chocolate chips
1 tsp. vanilla extract
1 unbaked 9 inch pie shell

Preheat  your oven to 325.  In a medium bowl, mix together flour and sugar.  Add all other ingredients, stirring until moistened.  Pour into an unbaked pie shell and bake 45-60 minutes, until set.  The top will also be lightly browned.

Serve with ice cream or sweetened whipped cream.

Notes

  • I used mini chocolate chips, because I liked the idea of smaller chips of chocolate scattered throughout.
  • If you use a glass dish like I did, it's best to reduce the heat of the oven by 25 degrees Fahrenheit and extend the time a little, which allows for a better browning of the crust while not burning everything else.

Smoked Chicken Wings

0

Category: , , ,


Do you smoke?  If there's any kind of smoking I can get behind, it's smoking meat.  Drew is our resident grill master, and he's been experimenting with smoking chicken in our kettle grill, and has been pretty successful with his outcomes.  Most recently he smoked chicken wings as opposed to a whole chicken, and they are good. 

                    
The the three part chicken wing fold
   
Smoking can either be done cold or hot.  This one falls into the hot category (I think).  The process is a bit detailed and it has several steps.  The recipe, from start to finish, will take around two hours.  The techniques, though, are simple, and I'd say even a pretty inexperienced person could do this if he or she pays attention to the steps. 


What makes the detail and time spent worth it is the huge payload of flavor.  Somehow the meat retains its moisture, and picks up a nice smokiness that complements rather than overpowers the flavor.


The technique that Drew employed is called the Snake Method, and it utilizes a combination of unlit coals, wood, and lit coals.  The pictures above demonstrate the setup steps.  The Snake Method allows the unlit coals to begin burning and continue the smoking process without having to disturb the meat as it smokes/cooks to replenish coals.  This method has so far given us consistent temperature and longevity of coals.

The first chicken wings go on- notice the drip pan below!

Alchemy- from this


To this.


He has now also done a whole chicken, turkey, and I think chicken leg quarters, all using this method, and it comes out nice.  The meat is great straight off the grill, on sandwiches, whatever.


Smoked Chicken Wings
feeds 2 people

2 lbs chicken wings
Salt and pepper

Place 4-5 chunks of wood (we used hickory) in a bowl and cover with water.  Keep submerged using a plate covered with water.  Soak approx. 30 minutes.

Prep your chicken by folding the wing tip under, making a triangle with the wings.  Pat dry with paper towels, and season well with salt and pepper.  Set aside until grill is ready.

Prep your grill:  in a kettle grill, lay down two rows of charcoal briquettes, about 1/3 of the way around the circumference.  Stack coals on top of these, about 3 briquettes high.  Put enough coals in a chimney starter to cover the bottom and light the chimney starter using newspaper.  Since there are so few, this only takes about 10-15 minutes.  When the coals are hot, dump the coals on one side of the charcoal snake, and lay the wood on top of the lit and the first part of the unlit coals, with even spacing of about 1-2 inches in between.

Place an aluminum drip pan (or a makeshift one from 3 layers of aluminum foil) in the middle of the grill and place the grate on top.  Oil your grate, and place your chicken directly over the drip pan.

Place the lid on the grill, and maintain grill temperature between 250 and 275.  Cook for about an hour or until the wings have an internal temp. of 165.  Remove from grill and allow to rest before eating, about 5-10 minutes.

Notes

  • The wings take the shortest of anything we've done so far.  The method stays the same, but the temperature and cook times may vary.  
  • These were really good with bbq sauce.

Tomato Bruschetta With Ricotta Cheese

0

Category: , , ,


This shadow in this picture looks a little like a hungry monster is about to devour this piece of bread, and that's probably not far from the truth.  This little toast is another example of how the simplest dishes can be the best, especially when you use fresh, in season produce.  We ate way more bread than we should because of this bruschetta.

Bruschetta is nothing new.  It's like Italian chips and salsa, only instead of chips, you use little pieces of toast, and instead of a salsa containing onion and pepper, it's a mixture of tomatoes and olive oil.  YUM!

The addition of ricotta cheese is actually a little bit of a fluke.  I was making eggplant involtini, and had some leftover ricotta filling, which just happened to work perfectly slathered on the toasts and topped with the tomato mixture.  

With or without the ricotta, this is still one of the most simple and delicious things I've made all summer.

Tomato Bruschetta With Ricotta Cheese
Serves several as an appetizer

1 pint cherry or grape tomatoes, halved or quartered, depending on size
1/4 c Extra Virgin Olive Oil
A few basil leaves, cut in chiffonade (about 1 Tb.)
Bread slices (baguette works well here)
Garlic clove
1/2 cup ricotta cheese
Juice of 1/2 a lemon
Salt and Pepper

Make your toast:  Preheat oven to 350.  Arrange bread on a baking sheet (I line mine with foil for easier cleanup) and drizzle both sides with olive oil.  Toast in oven, flipping halfway through, about 10 minutes.  You may need to adjust time for your own oven.  Remove and rub lightly with a garlic clove.

In a medium bowl, place your tomatoes, about 2 Tb olive oil, and your basil leaves.  Salt and pepper to taste.  I probably put in 1/2 tsp. salt and 4 grinds of the pepper mill.  Stir and allow to sit for a few minutes.

In a small bowl, stir together ricotta, lemon juice, and salt and pepper to taste.  

When ready to serve, smear the ricotta cheese onto the toasts and top with the tomato mixture.  

Make Ahead:  The tomatoes are best when made not too long before serving, but you could toast the bread and make the ricotta mixture ahead of time.


Snickers Ice Cream Cake....AKA Enemy of Swimsuit Season, A PinterestFind

0

Category: , , ,


Have you ever heard that rule about clothes, that when you buy something new, something old has to go?  The idea behind is two-fold; you won't end up with so many clothes that your closet takes over your life, causing you to forget what you own, and you become more purposeful in your shopping if you know you're going to have to give up something to buy that something new.  

I try to be like that with Pinterest.  Sort of.  My rule is that I won't pin it unless I have some sort of plan or desire to make it, and I have a real, legitimate plan to make everything I pin.


Stop laughing!  I'll get there, eventually.  I saw this Snickers Ice Cream cake pin one day, and pinned it.  The original photos were so striking, and, well, Snickers and Ice Cream?!  No need to say more.  


I had the occasion to make it last week for my father-in-law's birthday dinner.  Birthdays are a big deal to me.  Everyone needs a birthday cake.  This ice cream cake is delicious, pretty, and over the top rich.  Did I mention it was also easy and can be made in just minutes, ahead of time?  Remind yourself to cut little slices.

adapted from Delish Dish/Better Homes and Gardens

2 cups chocolate cookie crumbs (I ground up non-name brand cream filled, chocolate sandwich cookies in the food processor)
1 stick butter, melted
1 quart vanilla ice cream
1 quart chocolate ice cream
1 bag mini Snickers (or maybe 5-6 full size bars), unwrapped and coarsely chopped

Preheat oven to 350 degrees.  In a bowl, mix together the cookie crumbs and the butter.  Spoon into a springform pan (9 inch diameter and 3 inch height) and press onto bottom and up the sides of the pan to form the crust.  Bake for 8-10 minutes or until crust is set.  Let cool on a wire rack for 15 minutes, and freeze at least 30 minutes.

About 15 minutes prior to taking crust out of freezer, take out vanilla ice cream and allow it to soften on counter.  Remove crust from freezer, and spread softened ice cream in an even layer over crust. Sprinkle with an even layer of the Snickers, reserving a couple handfuls (1/3- 1/2 cup) for the topping.  Return to freezer and freeze at least 1 hour.

About 15 minutes prior to adding the chocolate layer, take the chocolate ice cream out of the freezer to allow it to soften.  Then remove the cake from the freezer and spread the chocolate ice cream in an even layer over the vanilla ice cream and Snickers layers, smoothing the top.  Cover and freeze at least 4 hours.

Remove the ice cream cake about 20 minutes before you want to serve it.  Just prior to serving, top with the remaining Snickers and more cookie crumbs, if you desire.  Cut with a larger knife and serve.

Notes

  • I don't have a springform pan.  I used a cheesecake pan, which also has a removable bottom.  The springform pan would likely produce neater sides, but any pan with a removable bottom and at least 3 inch sides works.
  • I don't know if the original recipe intended me to use fake Oreo crumbs, but I would not add sugar to the crust if you go with the sandwich cookie option.  Also, if you process the whole bag into crumbs, you will have more than enough for the crust, a nice little topping layer, and some left over.
  • The crust was a little greasy.  I would probably cut back on the butter next time, starting with 1 Tb. at a time.  I have not tested this, though.
  • The crust is rock hard when frozen.  You want a good knife and some elbow grease.
  • I wait until the end to top the ice cream cake with the other Snickers so that they aren't too hard.

Crunchy Roasted Chickpeas

0

Category: , , , ,


I am always the last person to know about something.  Juicy gossip?  All dried up by the time I hear about it.  Not that gossip is good, but you get my point.  I am not the person to ask about what's going on.  I'm also not a trendy person.  I'm that person wearing some of the same pieces she wore in high school.  

The same goes with food, which brings me to today's recipe.  I first saw the idea/recipe a couple years ago, but it wasn't until a few weeks ago that I made these little gems.   They're one of my new food fixations.  I brought them to the beach when I went with my side of the family, thinking I was about to rock their snacking world, and the dialogue went something like this:

Me:  I made crunchy roasted chickpeas for us to snack on.  You have to try them; they are so good!
Mom:  Oh, yeah.  They are good!  
Me:  You know about them?
Mom:  Yeah, we've made them a few times.  We like them.

Again, the last to know about/try something new(er).  I hope that you will not be the last to try these crunchy roasted chickpeas.  They make a great snack- they're affordable, healthy, and tasty, and very transportable.  The only problem is that you'll look down and wonder, "who ate all my chickpeas?!"

from Everyday Food magazine

2 cans or 3 cups prepared chickpeas
3 tablespoons olive oil
Coarse Salt
1 1/2 tsp. flavoring spice of your choice

Preheat oven to 400 degrees. Drain and rinse chickpeas and scatter on a paper-towel-lined rimmed baking sheet. Let stand 15 minutes. Remove towels and toss chickpeas with olive oil. Roast until crisp and golden, about 45 minutes, stirring occasionally. Toss with salt and ground seasonings if desired, and serve.

Notes
  • I used chickpeas that I prepared from dried ones.  I soaked them overnight and then cooked them on the stove top, bringing them to a boil and then cutting the heat back to simmer them until softened, around 1- 1.5 hours.  I used those in place of the canned chickpeas, and I used about 1/2 lb.
  • I have tossed the chickpeas with various combinations, but my favorite is chili powder and ranch dressing mix.  Paprika/smoked paprika and plain, salted are good too.


Chocolate Hazelnut Pot De Creme

0

Category: , ,


Have you ever had a pot de creme?  If not, I've got your back- the t is silent (those French!).  I had not had one before I made these, but had seen them on food shows and in cookbooks/magazines.  They didn't strike me as incredibly interesting until around Valentine's I saw an episode of the old Food Network Show, The Best Thing I've Ever Made, the chocolate episode.  Aarti Sequeira made these chocolate hazelnut pots de creme and she just raved about them, as did the people who were eating with her.  It seemed easy, economical, and impressive, so why not?  Drew and I made them for our belated Valentine's Day meal.  We are sold.


Think of this as a Nutella-flavored, thick pudding with a spicy kick at the end.  They're so good, and to top them with freshly whipped cream, chopped hazelnuts, and some sea salt sends you out of this world.  It all seems so simple- chocolate, nutella, heavy cream, and egg yolks.  What results, though is a dense, smooth custard that is absolutely packed with flavor and give you some complexity and depth of flavor as your taste buds sense chocolate, hazelnut, and the spicy Sriracha.  The whipped cream serves to cut the richness while adding more creaminess, and the salt and hazelnuts just intensify everything.  Pardon me while I go make more right now.


These, by the way, are so simple, but are elegant in an understated way.  Their individual serving size makes them fun.  They can be dressed down by putting them in regular custard cups or even 8 oz Mason jars, or dressed up by putting them in nicer dishes or even pretty stemmed glasses.  We made these for our Valentine's date night.  I'd definitely make them for a dinner party.  


Chocolate-Hazelnut Pots de Creme
from Food Network/ Aarti Sequeira
serves 8

1 cup chocolate-hazelnut spread, such as Nutella
3 ounces dark or semisweet chocolate (70 percent and over), chopped
1 1/2 cups whole milk
1 cup heavy cream
1/4 cup granulated sugar
3/4 teaspoon kosher salt
6 large egg yolks
1 1/2 to 2 teaspoons Sriracha sauce
1/2 teaspoon instant espresso powder, optional
1/2 teaspoon vanilla extract
Whipped cream or creme fraiche, for topping
Cocoa or grated chocolate, for dusting
Minced hazelnuts, for garnishing
Sea salt, for garnishing

poon the chocolate-hazelnut spread into your blender. Add the chopped chocolate. Set your ramekins/cocottes/teacups/glasses on a baking sheet.

In a medium saucepan, whisk together the milk, heavy cream, sugar, salt and egg yolks over medium heat. Cook, stirring constantly, 8 to 10 minutes; I like to use a flat-bottomed wooden spatula so that I can make sure the eggs aren't catching on the bottom and cooking. Cook until the custard thickens, resembling something like very thick paint. It should register between 175 and 180 degrees F on an instant-read thermometer. Another test: the custard should coat the back of the spatula, and when you draw a line across the back of the spatula with your (clean!) finger, the line should hold and maintain its edges without running. Remove from the heat immediately.

Now, pour the warm custard through a strainer into the blender. Let it sit 5 minutes to melt the chocolate. Add the Sriracha, espresso powder if using and vanilla extract. Then, put the lid on the blender, hold down with a thick kitchen towel, and blend on low, then high, until smooth and combined, scraping down the sides if necessary. Taste for seasoning.

Pour the custard into your containers, tapping them against the rim of the baking sheet to remove air bubbles. Pop them in the fridge and chill until the custards are set, 2 to 3 hours.

Top with whipped cream or creme fraiche, some grated chocolate and minced hazelnuts. A little sea salt would be nice too.


Notes

  • If you do decide to use whipped cream to garnish your pots de creme, you'll want about 1 1/2 to 2 cups total heavy cream.
  • I used a candy thermometer to make sure the temperature of my custard was right.

PW's Drip Beef

0

Category: , , ,

This recipe is featured in Pioneer Woman's second cookbook, Food From My Frontier, and my only regret could possibly be that I didn't make it sooner.  Part of the reason I didn't is its long cooking time.  I then saw an episode of Pioneer Woman on Food Network, and she made this in stages.  Doing food anc cleaning in stages is just the best idea.  Then I decided to make it myself, in stages, and took it a step further and made it in my slow cooker while I slept.  Thank God for slow cookers!


This recipe cranks out a roast that, when shredded and allowed to rest a while in the cooking liquid, becomes tender and moist and slightly spicy/tangy.  It was so good that we didn't even mind eating on it all week, and Drew made it for his fire station just a few days later.

Deglazing the pan with some of the main cooking liquid to get all those delicious brown bits- all is poured into the slow cooker
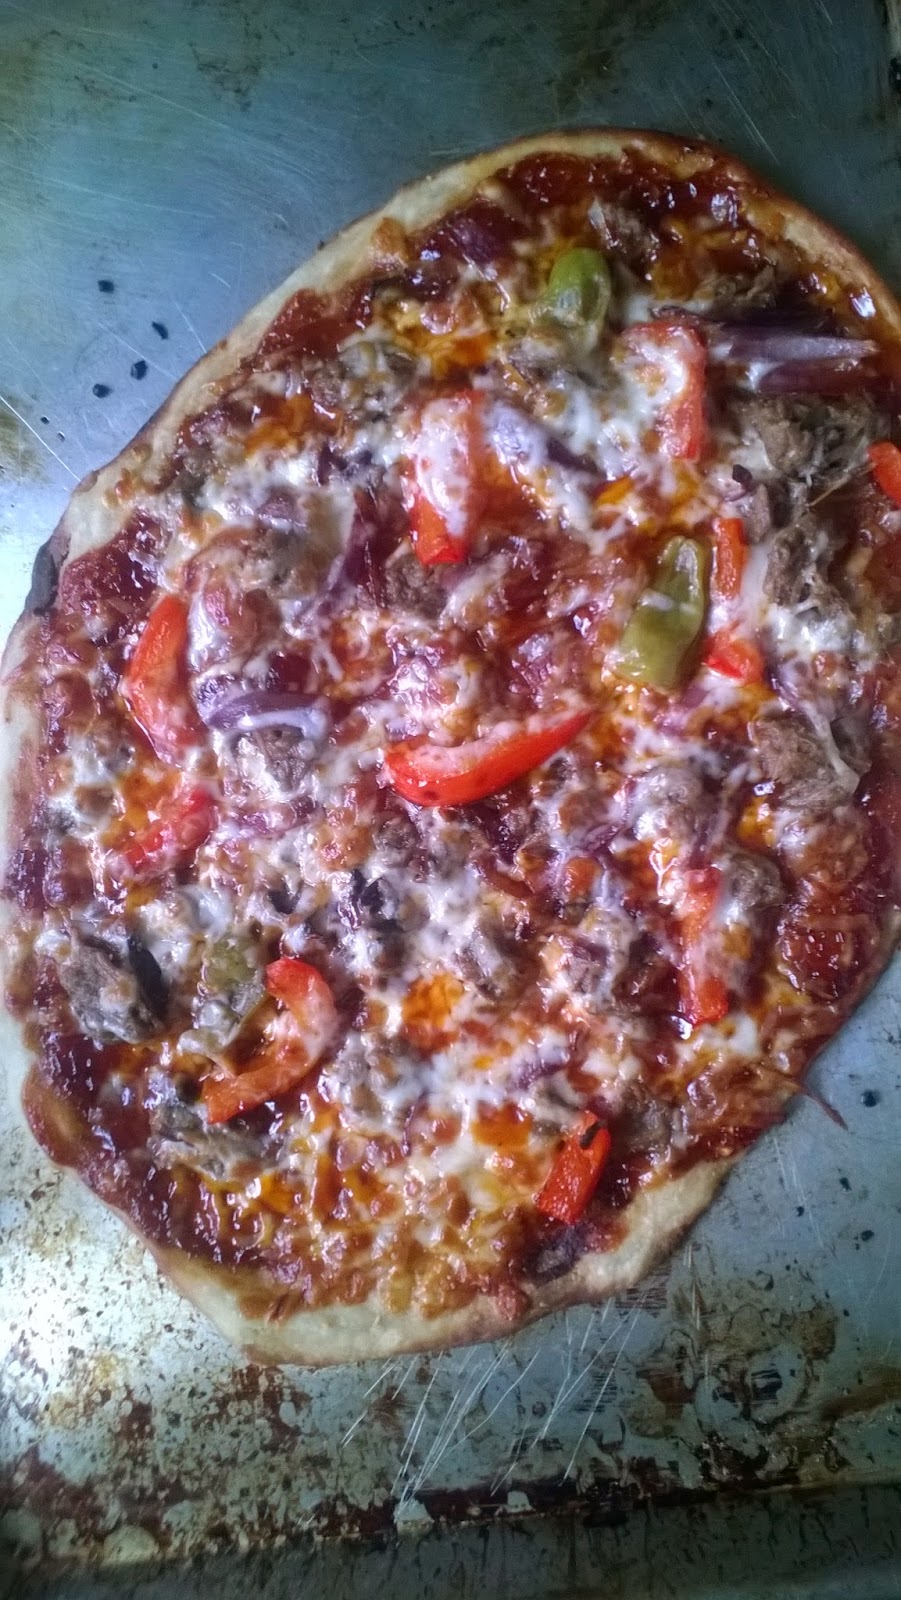
PW suggests you serve these on sandwiches, and that's how we served them the first few times- on rolls with caramelized onions and meunster cheese.  Later in the week, we topped a pizza with the drip beef (yes!) and I thought about how good it'd be over mashed potatoes or polenta (grits), but I didn't try that because I ran out.


Depending on the size of your roast, you can probably feed 10ish with this recipe.  If you don't eat like a plague of locusts, maybe more.  We used bakery crusty hoagie rolls, a baguette, and plain hamburger buns.  All worked just fine, but the crustier rolls hold up better with the liquid.


Drip Beef
adapted from Pioneer Woman

1 whole Beef Chuck Roast, 2.5 To 4 Pounds
2 cups beef broth
1 cup water
2 Tablespoons (heaping) Italian Seasoning
1 jar (16 Oz) Pepperoncini Peppers, With Juice
1 large sweet onion, sliced
Slices of provolone or meunster cheese
Buttered, Toasted Deli Rolls

Sprinkle the chuck roast with salt and pepper.

Melt 2 tablespoons canola oil in a heavy pot over high heat. Sear both sides of the chuck roast until very browned, about 5 minutes in all. Place the beef into a slow cooker.  Pour in the beef broth and 1 cup water. Add the Italian seasoning, and then pour in the pepperoncini with their juices. Now cover the pot and cook on low heat for 8-10 hours (high 4-5 hours) or until meat is very tender and falling apart.

At this point, you have the option to remove the pepperoncini, leave the meat in tact, and refrigerate it for later.  If you do this, skimming the fat off the top is much easier.  If you want to eat it immediately, skip this step and just shred the beef using a couple forks.

If you make sandwiches, prior to building the sandwich, heat a skillet over medium heat and add the remaining 1 tablespoon butter. Add the onions and saute until light golden brown. Set aside.

To serve, slice rolls in half; butter and toast under broiler. Heap a generous portion of meat on each roll, and then spoon some of the cooking liquid over the meat. Top with a few peppers from the pot and plenty of caramelized onions. If using, top with cheese and re-broil that half.  Top the sandwiches with the tops of the rolls and serve to a roomful of ravenous guests.

Notes

  • When searing the meat, PUT THE OIL INTO A COLD PAN and allow it to heat.  DO NOT wait until the pan is hot.  The picture below is the aftermath of what happens when you don't follow these instructions.  You get a small kitchen fire and a burned, warped pan.  Please, learn from my stupid mistake.
    The pan, after a small fire.  It's a testament to heating the oil with the pan.
  • This beef just gets better the longer it sits in the cooking liquid.  Right after the beef finished in the crock pot and I tried it, I wasn't blown away, but a few hours later it was a little better.  The next day, it was so good you almost couldn't wait for the roll to eat your share.  

  • If you want to make a pizza, feel free to use your creativity to come up with whatever toppings you want.  We used barbecue sauce for the base, mozzarella cheese, the drip beef and some pepperoncinis, some lightly sauteed onion, red bell pepper, and sauteed mushrooms.  Delish!