spoon

PW's Drip Beef

0

Category: , , ,

This recipe is featured in Pioneer Woman's second cookbook, Food From My Frontier, and my only regret could possibly be that I didn't make it sooner.  Part of the reason I didn't is its long cooking time.  I then saw an episode of Pioneer Woman on Food Network, and she made this in stages.  Doing food anc cleaning in stages is just the best idea.  Then I decided to make it myself, in stages, and took it a step further and made it in my slow cooker while I slept.  Thank God for slow cookers!


This recipe cranks out a roast that, when shredded and allowed to rest a while in the cooking liquid, becomes tender and moist and slightly spicy/tangy.  It was so good that we didn't even mind eating on it all week, and Drew made it for his fire station just a few days later.

Deglazing the pan with some of the main cooking liquid to get all those delicious brown bits- all is poured into the slow cooker
PW suggests you serve these on sandwiches, and that's how we served them the first few times- on rolls with caramelized onions and meunster cheese.  Later in the week, we topped a pizza with the drip beef (yes!) and I thought about how good it'd be over mashed potatoes or polenta (grits), but I didn't try that because I ran out.


Depending on the size of your roast, you can probably feed 10ish with this recipe.  If you don't eat like a plague of locusts, maybe more.  We used bakery crusty hoagie rolls, a baguette, and plain hamburger buns.  All worked just fine, but the crustier rolls hold up better with the liquid.


Drip Beef
adapted from Pioneer Woman

1 whole Beef Chuck Roast, 2.5 To 4 Pounds
2 cups beef broth
1 cup water
2 Tablespoons (heaping) Italian Seasoning
1 jar (16 Oz) Pepperoncini Peppers, With Juice
1 large sweet onion, sliced
Slices of provolone or meunster cheese
Buttered, Toasted Deli Rolls

Sprinkle the chuck roast with salt and pepper.

Melt 2 tablespoons canola oil in a heavy pot over high heat. Sear both sides of the chuck roast until very browned, about 5 minutes in all. Place the beef into a slow cooker.  Pour in the beef broth and 1 cup water. Add the Italian seasoning, and then pour in the pepperoncini with their juices. Now cover the pot and cook on low heat for 8-10 hours (high 4-5 hours) or until meat is very tender and falling apart.

At this point, you have the option to remove the pepperoncini, leave the meat in tact, and refrigerate it for later.  If you do this, skimming the fat off the top is much easier.  If you want to eat it immediately, skip this step and just shred the beef using a couple forks.

If you make sandwiches, prior to building the sandwich, heat a skillet over medium heat and add the remaining 1 tablespoon butter. Add the onions and saute until light golden brown. Set aside.

To serve, slice rolls in half; butter and toast under broiler. Heap a generous portion of meat on each roll, and then spoon some of the cooking liquid over the meat. Top with a few peppers from the pot and plenty of caramelized onions. If using, top with cheese and re-broil that half.  Top the sandwiches with the tops of the rolls and serve to a roomful of ravenous guests.

Notes

  • When searing the meat, PUT THE OIL INTO A COLD PAN and allow it to heat.  DO NOT wait until the pan is hot.  The picture below is the aftermath of what happens when you don't follow these instructions.  You get a small kitchen fire and a burned, warped pan.  Please, learn from my stupid mistake.
    The pan, after a small fire.  It's a testament to heating the oil with the pan.
  • This beef just gets better the longer it sits in the cooking liquid.  Right after the beef finished in the crock pot and I tried it, I wasn't blown away, but a few hours later it was a little better.  The next day, it was so good you almost couldn't wait for the roll to eat your share.  

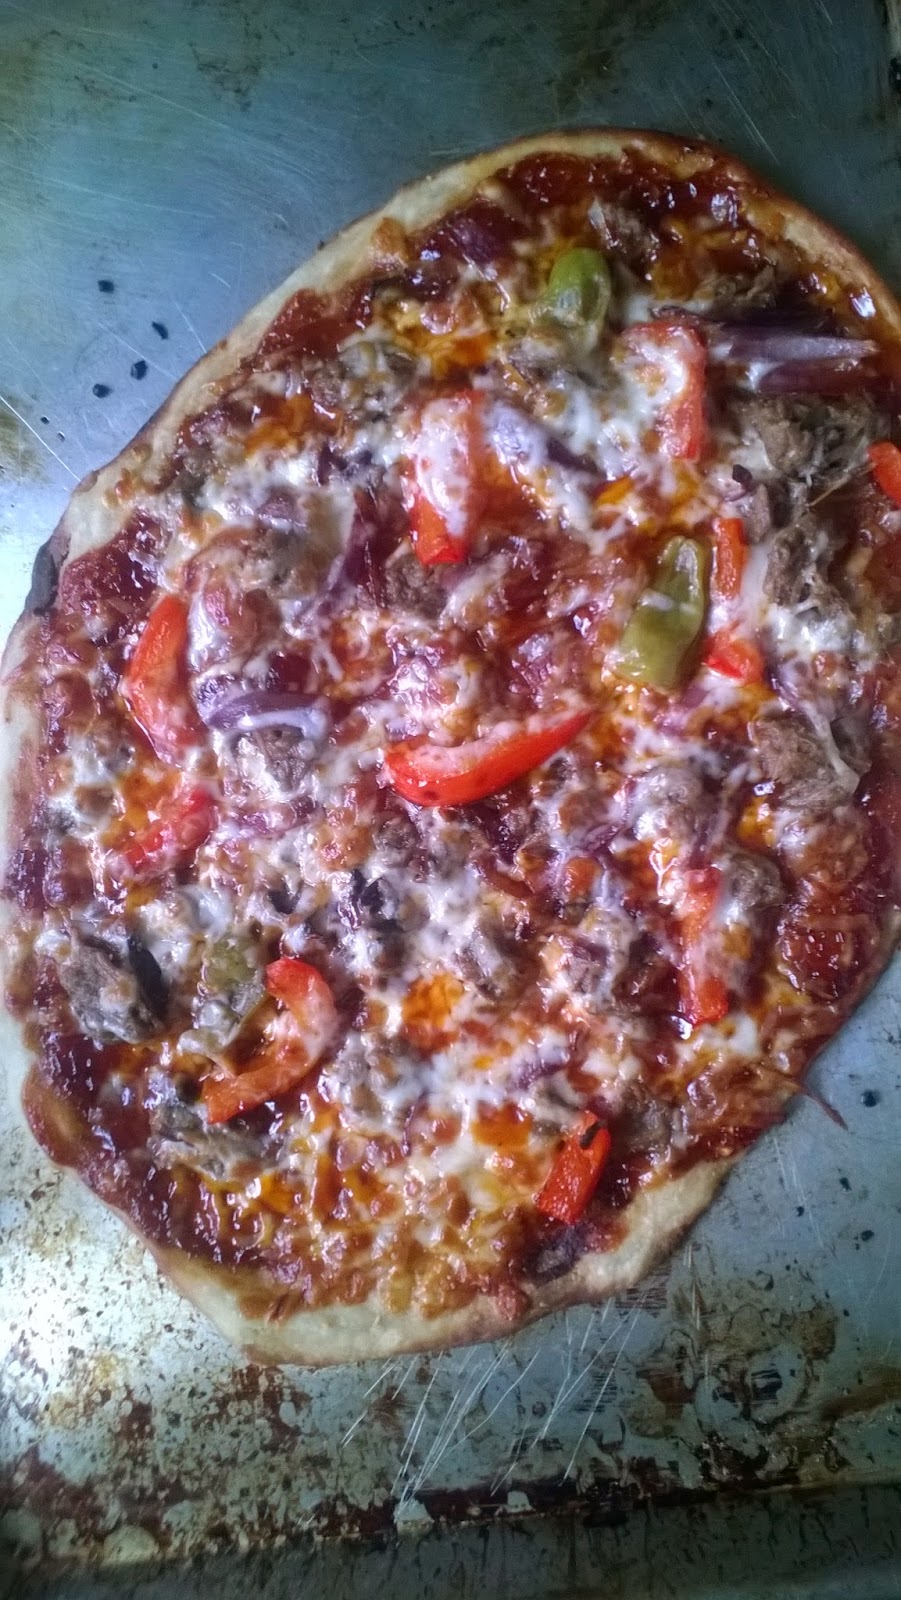
  • If you want to make a pizza, feel free to use your creativity to come up with whatever toppings you want.  We used barbecue sauce for the base, mozzarella cheese, the drip beef and some pepperoncinis, some lightly sauteed onion, red bell pepper, and sauteed mushrooms.  Delish!

Lazy Chiles Rellenos

0

Category: , , , ,


Mexican/Southwestern style dishes are some of our favorite dishes to make.  There's just something about the spices and the simplicity.  And the chips and salsa.  One day I made a Smitten Kitchen original that is featured in her cookbook, black bean and spaghetti squash tacos.  They sound weird, and they are, but they're also pretty addictively good.  Anyway, at the same time I had planned to make these tacos, I caught an episode of The Pioneer Woman on Food Network and saw the recipe for these chiles rellenos.  I made them with the tacos.  We loved them.  The end.  The rest of the story is told here.


So, sometimes a new recipe experience can be tainted because a dish doesn't taste like what you expect.  You know, the "oh, I subbed turkey in for the ground beef in the spaghetti sauce" or the use of say, spaghetti squash in place of actual spaghetti noodles.  Those healthier substitutions leave your taste buds and brain sort of confused and a little ripped off.  While there's no pretense of healthier here, you need to go ahead and tell yourself that these are not real chiles rellenos.  There's no batter, no fryer, and no beef.  Once you get past the fact that these aren't real chiles rellenos, you can love the dish without reservation.  These are a bit of an imposter, but they're no less delicious.  This dish is really more like a chiles rellenos casserole- a riff on the classic.


These are great though- breakfast, lunch, or dinner, they work as a side dish, and they play well with tortillas and salsa.  They reheat pretty well, and serve a small crowd, or give you a few days of leftovers.  The original post from the Pioneer Woman will be linked in the blog post.  See how I made them below.

adapted from Pioneer Woman

3-4 poblano peppers
1-1/2 cup Monterey Jack Cheese, Grated
5 large eggs
2 cups milk
 Salt And Black Pepper To Taste
1/2 teaspoon paprika
1/4 teaspoon cayenne pepper

Set oven to "broil," or if you have a gas stove, turn on a burner.  Roast your chiles under broiler or over gas flame, turning until the skin has some blackish-brown spots and is blistering on all sides.  Remove from the broiler or burner and place peppers in a bowl, cover them with plastic wrap, and allow them to cool, about 10 minutes or so.  Meanwhile, preheat the oven to 325 degrees.  When the peppers' skins are loosened and the peppers are cool enough to handle, peel off the skin and cut the peppers in half.  Cut out the cores and seeds, and cut the chiles in half so that they lay flat.  

Mix together eggs, milk, salt, pepper, paprika and cayenne.

Add a single layer of chilies on the bottom of a 9 x 11-inch baking dish.  Top chilies with half the grated cheese.  Repeat with another layer of chilies and another layer of cheese.  Pour egg mixture all over the top.

Place into a larger baking dish or rimmed baking sheet. Pour in 1/2 inch of water and bake for 35 to 45 minutes, or until completely set.

Cut into squares and serve with warm corn tortillas!

Vegetable- Beef Soup

0

Category: , , , , ,


It is (I hope) nearing the end of soup season, but it's cold and rainy here this week, so I thought I'd share one more soup recipe with you.  You may already have a killer vegetable-beef soup recipe, but in the case that you don't, I submit mine to you.  It actually took me a few tries and reading through/testing several recipes to get this recipe right.  It's such a simple, basic, and iconic dish, but like fried okra, success eluded me for a while.  Actually, success may still be eluding me on the fried okra, but that's another story for another day.  On our last snow day, though, I think I pretty much figured it out.  I actually came up with a good recipe, which makes me feel pretty excited.

We all have our own ideas of what goes into vegetable-beef soup, so feel free to change as you see fit.

Vegetable Beef Soup
serves 6-8

1 lb lean ground beef
1 onion, diced
2 cloves garlic, minced or pressed
2 Tb vegetable oil
1/2 tsp Kosher salt
1- 28 oz can diced tomatoes in their sauce (or 1 qt home canned tomatoes)
1- 8 oz can tomato sauce
1- 16 oz bag frozen mixed vegetables, thawed
1/2 cup uncooked macaroni
2 medium sized red skinned potatoes, cubed
1 1/2- 2 qt. beef broth
Freshly ground black pepper


In a large pot or dutch oven, heat your oil over medium to medium-high.  Add the beef, onion, and garlic.  Season with salt and pepper and cook until onion is softened and beef is cooked.  Add in the tomatoes, their juice, and the can of tomato sauce.  Cook for a minute.  Add in the vegetables, potatoes, and broth.  Bring to a boil and boil 15-20 minutes or until potatoes and vegetables are tender.

Meanwhile, bring a medium- large pot of water to a boil over high heat.  Salt the water and cook the pasta until al dente.  Add to the soup at the end of the cooking time.  Taste and adjust seasonings as necessary.

Notes

  • The soup got better the longer that it sat, so feel free to make this in advance and refrigerate or even freeze it.  
  • I wrote myself a note to watch the salt level.  If you don't drain/rinse your pasta and just use a slotted spoon to add it to the soup, that will add some salt as well.  Since people have different salt sensitivities, taste and season to your own liking.  Is "liking" when used that way a Southern thing?
  • As I mentioned before, this is the first real breakthrough success I've had with vegetable beef soup, so it'll likely be a work in progress.  I made myself a note that I might try adding some tomato paste in with the beef and onion and cook a minute, just before adding the other tomatoes.  
  • I also made myself a note that I might have missed the texture and even flavor that lima beans add.  
  • From experience and probably various TV cooks, I have learned to cook the pasta separately, and that it seems to expand to approximately 237 times its original volume when you add it to a soup and let it sit in your soup, so that when you come back to the soup, it seems like it's been overtaken by noodles.  Cooking it separately and keeping it separate will help solve that problem.  If you don't do this, be prepared to add extra liquid.  
  • This is great served with cornbread!

Dill Pickle Dip

0

Category: , , ,


I know we all have a little bit of a thing for chips and dip, am I right?  Long ago there were plain chips and french onion dip, and then we added in tortillas and salsa.  Now it's a multicultural free-for-all, with pita and tzatziki, hummus, and all sorts of other variations from around the world.  Isn't it great how much variety we have?

So this one is a new spin on the old, classic potato chip and dip concept, and it seems weird at first, but if you like pickles, the more you think about it, the better of an idea it seems.  As my friend Charlotte said, the flavor of this dip is like when you order a sandwich that is served with chips in a deli, and beside the chips is a dill pickle spear, and some of the pickle juice mingles with the chips beside it.  Those are your favorite chips, too, right?

This dip is easy, and makes a small batch, but with dips like this, a little goes a long way.  I found the original on Pinterest and made it for a Super Bowl party, and it was determined to be a success.  I did have to adjust the original recipe, so I'm posting as I made it.

Dill Pickle Dip
adapted from Buns In My Oven blog

1- 8 oz bar cream cheese, softened
1 Tb Worcestershire Sauce
1/2- 1 cup dill pickles, chopped
1 Tb (or more) pickle liquid
1 tsp dried dill

In a medium bowl, beat the cream cheese until smooth with an electric mixer.  Add in Worcestershire and pickle liquid and beat until well incorporated.  Stir in the pickles and dried dill with a rubber spatula or the beater.  At this point, taste and adjust seasonings as necessary.  Chill in refrigerator, preferably overnight.  Garnish with fresh or dried dill and serve with plain or plain ruffled chips.

Notes

  • The original recipe didn't have enough flavor to me, so I increased the dried dill.  It really helped the flavor.
  • This also benefits from a rest in the fridge to allow the flavors to mingle.  

Roasted Salmon with Kale and Cabbage

0

Category: ,


I'm going to start off telling you a little bit of a tragic story, but only a little.  Drew and I decided to celebrate Valentine's Day at home with a nice dinner.  Well, a good portion of that week, Drew had been sick, but by Thursday, he seemed to start improving.  Saturday, Feb 15th came (the day we had planned to celebrate because he was working the actual day), and he felt worse.  I had already defrosted some salmon in order to make a recipe I had seen online, but it involved butter and some other things that you probably shouldn't eat if you're sick, so I changed it to this recipe.  Then I got sick with the flu that very night.  I told Drew that normal men get their sweethearts flowers or chocolate, NOT the flu.  He has so much to learn.  


So, while our Valentine's dinner didn't turn out like we had planned, we did try a new salmon recipe, and it. is. GOOD.  It's a lighter dish, with the salmon being roasted over kale and savoy cabbage and everything getting a light drizzle of homemade vinaigrette.  The kale takes on a deeper, more complex flavor from the roasting, and the cabbage mellows and almost sweetens.  The salmon came out really well- maybe the best I've ever done. Not dried out, and not underdone. Despite my best attempts, I tend to overcook the thinner parts, and sometimes the whole thing.  Sigh.  Even though everything is roasted, it all tastes fresh and pleasant.  It also comes together in 20 minutes.  This is one of those recipes that seem too good to be true- quick, affordable, easy, and incredibly tasty, with little cleanup.  Bliss!

The best way I've found to remove the core from a head of cabbage- cut it out in a triangle shape.


from Everyday Food/Martha Stewart
serves 4

1 bunch kale, leaves rinsed and stems removed, rough chopped (about 5 cups)
1 small head (or 1/2 large head) savoy cabbage, core removed and sliced (about 4 cups)
6 Tb olive oil, divided
1 lb salmon, cut into 4 fillets
1 tsp lemon zest
2 Tb lemon juice
1 Tb dried dill, or 1/4 cup fresh
1 tsp. dijon mustard

Preheat oven to 450 degrees. On a rimmed baking sheet, toss kale and cabbage with 2 tablespoons oil and spread in an even layer; season with salt and pepper and bake 6 minutes. Stir. Season salmon and add to baking sheet. Bake until salmon is cooked through, about 10 minutes.

Meanwhile, whisk together lemon zest and juice, dill, mustard, and remaining 1/4 cup oil. Season. Drizzle salmon and vegetables with dressing before serving.

Notes
  • The original recipe calls for Tuscan kale, aka lacinato or black kale.  Our local supermarket doesn't carry that, so I used regular kale.  While I am sure the effect is a little different, taste was still great, and I likely saved money vs. Tuscan kale (if I'd had the choice). 
  • This does not reheat well, so I'd recommend only making what you need for that night.

Banana Pudding

0

Category: , ,


Fact:  banana pudding is on my list of all time favorite desserts.  I can remember my parents taking me to eat at the Holiday Inn in Kannapolis, NC after church on Sundays as a child, and my favorite part of the whole experience was the little bowl of banana pudding on the dessert table.  I felt so fancy, being able to eat there.  As you can see, I am clearly dated to my 80's decade, and it doesn't take much to please me.


Certain treats from childhood have just stuck with me that way- rice krispie treats, banana pudding.  Their appeal doesn't wane with age; they remain just as dear to my heart and palate, and maybe even get better.  Do you have foods like that?


Growing up, we always made banana pudding with instant pudding mix.  I didn't know of any other way to make it.  Then I met Drew, and he insisted I'd been making an imposter all these years, and that the only real way to make banana pudding was to make the pudding from scratch.  While I still disagree that it's the only way, homemade is hard to beat.  There's a thickness and a richness to the pudding that you can't get from the boxed mix.  It's so good, and it makes me sad that I don't have a bowl to eat right now.


Banana Pudding
From the Honeycutt family
Serves 8-10

4 egg yolks
1/2 c sugar
3 cups milk
4 heaping TB flour
1 TB butter
1 TB vanilla extract
Pinch salt
2-3 ripe bananas
Vanilla Wafers
Meringue (recipe to follow) or whipped cream

Take about 2-4 TB milk and pour into a small bowl.  Add the flour and combine to make a slurry.  In a medium pot over medium or medium low heat, whisk together egg yolks, sugar, salt, milk, and slurry.  Gently heat to boiling and thickened to resemble very thick paint or thin pudding.  Remove from heat and stir in butter and vanilla until mixture is smooth.

In a 1 1/2 to 2 qt casserole dish, layer vanilla wafers and bananas, layering until dish is mostly filled.  This takes 2-3 bananas and about half the box of wafers.  Pour pudding mixture over wafers and bananas and place in fridge overnight.  When serving, top with meringue or whipped cream.

Meringue
4 egg whites
1/4 tsp cream of tartar
1/4 c confectioners sugar
1 tsp. vanilla

In a large bowl or the bowl of a stand mixture, add the egg whites and beat on high, whether using a hand mixer or stand mixer.  As the mixer is running and the whites are being beaten, sprinkle in the cream of tartar.  When soft peaks form, stop the mixer and add the sugar and vanilla.  Beat to medium-stiff peaks.  Spread over the pudding and place into a 350 oven until the meringue is lightly browned.


Notes

  • It is absolutely necessary for you to let your pudding "rest" in the refrigerator overnight, or for several hours.  If you eat it right away, it sort of tastes floury and like paste.  If you let it wait, the flour flavor mellows, the vanilla becomes more pronounced, and the wafers soften.  Everything thickens and melds together and, well, it's just wonderful.  
  • The EdibleGivens household is divided on the meringue vs. whipped cream topping debate.  Drew thinks it's meringue or nothing.  I tend to prefer whipped cream.  This choice, however, is an easy one.  You really can't go wrong.  Put the meringue on the pudding, however, right before you're going to serve it and not when you stick it into the fridge.  Same with the whipped topping.


Huevo in the Hole

0

Category:


So, I don't know about you, but the weekday breakfast is the meal I most struggle with, in terms of variety, speed, and nutrition.  I need more than a breakfast shake or bar to keep me going past 8 am, let alone until lunch.  I've never understood those people who can eat nothing or a small something and not pass out by 10 am.  I also get bored with the same thing day in and day out and am always looking for new things to cook for Drew and me.  Since I work a full time job outside the home, I love meals that can be prepped in 10-15 minutes or less.  What do you make when you want a fast, nutritious breakfast?


Anyway, in my adventures to expand my breakfast repertoire, I came across this idea in Ree Drummond's newest cookbook, The Pioneer Woman Cooks: A Year of Holidays, and I adapted it.  Remember the Egg in a Nest or Egg in a Hole you likely know and love from childhood?  Well, this is a wondefully Mexican play on it.  2 Tortillas nestle a sunny side up or over easy egg (your choice), and the whole delicious thing is topped with salsa.  Yum!


Huevo in the Hole
1 egg/tortilla nest (you'll want 1-2 of these per person)
For each egg in the hole, you want:
2- 6 inch corn or flour tortillas
1 egg, cracked but not beaten
Salt and Pepper
Salsa

Preheat a medium sized skillet (preferably cast iron) to medium-high.  Use a biscuit or cookie cutter to cut out a hole in the center of each tortilla, approx 2-3 inches in diameter.  Place the tortillas, 1 at a time, into the dry skillet and lightly toast each side.  This will take approx. 30 seconds to 1 minute per side.

Then, remove the tortillas, lightly butter the skillet, and return the tortillas, this time stacked one on top of the other, to the pan.  Pour the egg into the hole in the center and sprinkle with salt and pepper.  Cook until the egg is set, either leaving it alone until cooked (sunny side up) or flipping it when mostly set on the first side to make an overeasy egg.  Top with salsa, avocado, hot sauce, etc.